Armanino Blog
Article

How to Manually Add Financial Dimension Mapping to the Excel Journal Entry Import Template

September 04, 2018

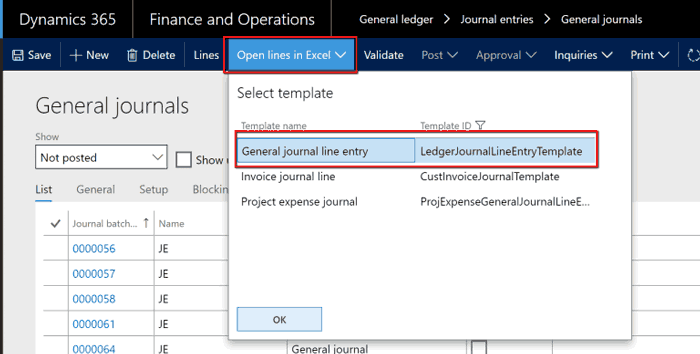
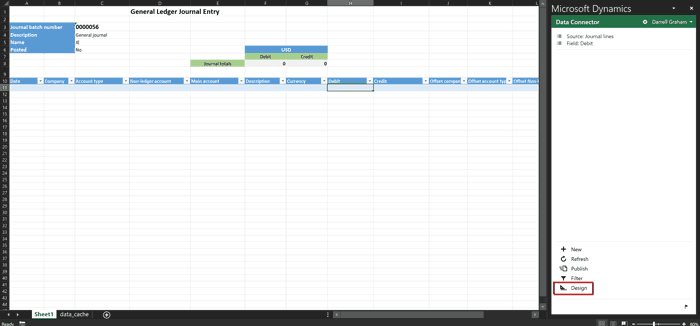
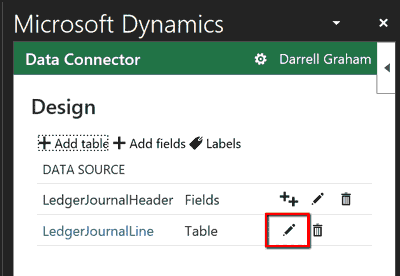
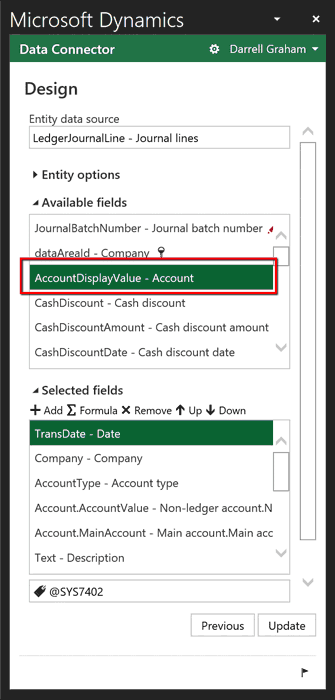
The Excel journal entry import template that comes standard with Microsoft Dynamics 365 is mapped to the main account field only; mapping to financial dimensions is not included. This is due to the dynamic nature of creating the financial dimensions and accounting structure in D365. Once the financial dimensions and accounting structure are finalized, a development task can be created to permanently add the financial dimension mapping to the template. In the meantime, users can manually add the mapping to test the system by following the steps below each time they import a journal entry via Excel.

  1. Open a journal entry in Excel by creating a journal header, clicking the Open lines in Excel menu button (General ledger > Journal entries > General journals) and selecting General journal line entry, then clicking OK: Dynamics 365-for Finance and Operations Open lines in Excel Screenshot
  2. In Excel, once the data connector (right pane) has connected and the metadata has been retrieved, the action buttons for the template will be enabled. Click on the Design button: Dynamics 365 for Finance and Operations Excel Design Screenshot
  3. Click the small pencil icon next to the LedgerJournalLine table to edit the mapping: Dynamics 365 for Finance and Operations Excel Ledger Journal Line Screenshot
  4. In the Available fields window, find Account Display Value – Account and add it to the Selected fields window by double-clicking it (note that it will be placed at the very end of the Selected fields list): Dynamics 365 for Finance and Operations Excel Design Account Display Value Screenshot
  5. Repeat step 4 to add the OffsetAccountDisplayValue – Account to the Selected fields
  6. In the Selected fields window, click on the AccountDisplayValue – Account field and use the Up arrow button to move it up the list until it sits next to the MainAccount – Main account.Main account field: Dynamics 365 for Finance and Operations Excel Design Selected Fields Screenshot
  7. In the Selected fields window, click on the MainAccount – Main account.Main account field and click the Remove button to remove it from the template (you will be using the field you just added to enter the entire accounting string): Dynamics 365 for Finance and Operations Excel Design Selected Fields Remove Screenshot
  8. Repeat steps 6 and 7 to move the OffsetAccountDisplayValue – Account field and to remove the MainAccount – Offset main account.Offset main account field.
  9. Click the Update button in the lower right corner of the Data connector A warning message will be displayed indicating that the template will need to be refreshed and any data already entered in the template will be lost. Click Yes to continue.
  10. Click Done at the bottom right of the Data connector window to close the editor.
  11. Click the Refresh button to activate your changes to the template Dynamics 365 for Finance and Operations Excel Refresh Screenshot
  12. You can now enter the entire accounting string in the Account and Offset account columns of the template per the legal entity's accounting structure. Note that these added columns will not show the lookup values in the Data connector

Stay In Touch

Sign up to stay up-to-date with the latest accounting regulations, best practices, industry news and technology insights to run your business.

Resources
Related News & Insights
sage-intacct-2024-r2-release-overview
Webinar
Discover the Newest Sage Intacct Updates With Armanino’s Experts

May 15, 2024 | 01:00 PM - 02:00 PM PT
Fireside Chat: Access to Top-Tier Talent Through Outsourcing
Webinar
The Crucial Role of Internal Communications in Driving Engagement

April 30, 2024 | 10:00 AM - 11:00 AM PT
5 Signs Your Business Has Outgrown its Legacy Accounting System
Webinar
Don't Let Your Legacy System Limit Your Potential

April 24, 2024 | 10:00 AM - 10:45 AM PT